Tired of downlights that create harsh glare or uneven spots? This can ruin a project's feel and reflect poorly on your sourcing. Let’s find the optics that guarantee top performance.
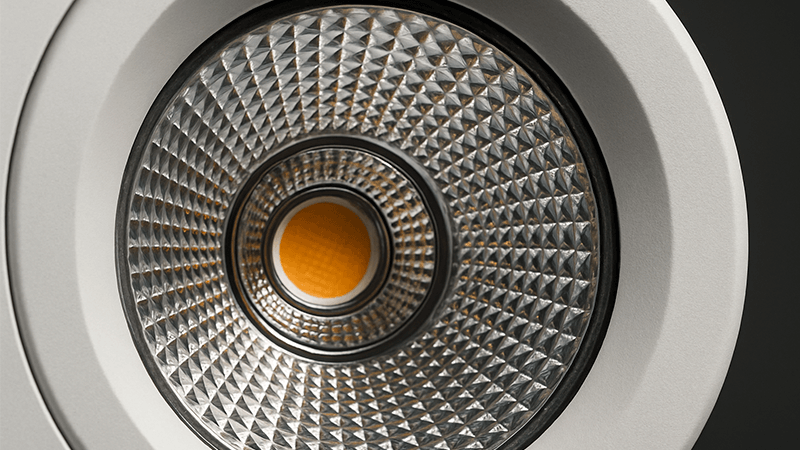
The best performance comes from optics perfectly matched to the LED chip, delivering over 90% system efficiency. Demand the photometric file (IES file) to verify a clean beam angle and look for advanced designs like Batwing distribution, which provides wide, uniform, and low-glare illumination.
Those basics are a great start for any buyer. But as an experienced purchasing manager, you know the details make the difference between a good product and a great one. I've spent years on the factory floor, working hands-on with these components. I want to share what I've learned from my experience, so you can make choices with absolute confidence. Let’s dive into the specifics that set premium downlights apart from the rest.
What is the most efficient downlight?
Struggling to find downlights that truly deliver on their promised brightness? You invest in high-lumen products1, but the final result looks dim. Let’s ensure you get the light you pay for.
The most efficient downlight has a high "optical system efficiency," often above 90%. This means the lens or reflector allows almost all the light from the LED chip to pass through. Always ask your supplier for this specific efficiency number, not just the raw lumen output.
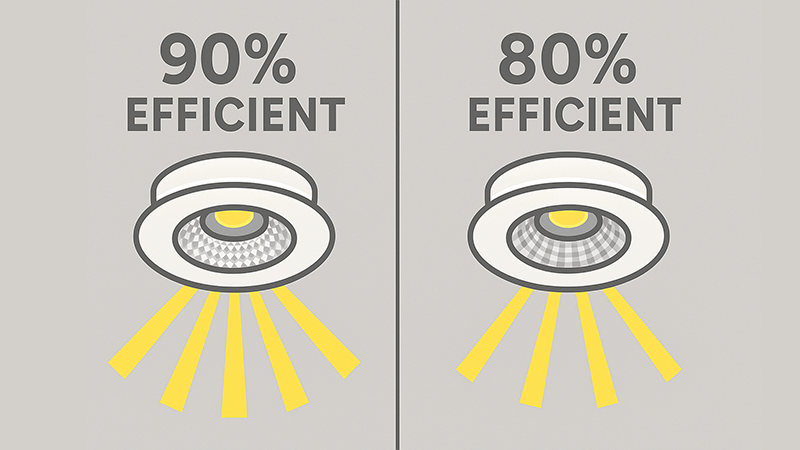
When I first started in this industry, I was focused only on the lumen output2 of the LED chip3 itself. It seemed logical. More lumens in, more light out. I quickly learned this was a rookie mistake. The real-world performance depends heavily on the optical system. That’s the journey the light takes from the chip, through the lens or reflector, and into the room. A poorly designed lens can trap or scatter light, sometimes wasting over 20% of the initial lumens. A great optical system, however, can achieve an efficiency of over 90%.
To help you secure the best products, here's what to look for and what to ask:
Key Efficiency Factors
- Optical System Efficiency: This is your most important metric. Directly ask the supplier, "What is the optical system efficiency4 of this downlight?" An answer below 80% is a red flag, while anything over 90% indicates a high-quality design.
- Optic & Chip Matching: The optic isn't a one-size-fits-all component. It must be designed specifically for the LED chip's size and light-emitting characteristics. A mismatch creates strange beam patterns and kills efficiency. I once saw a factory switch to a cheaper LED chip without redesigning the optics. The efficiency dropped nearly 15%, and the light distribution became a mess. It's a common cost-cutting measure you must watch out for.
| Efficiency Grade | System Efficiency | Expected Quality |
|---|---|---|
| Premium | > 90% | Excellent light transfer, minimal loss. |
| Standard | 80% - 90% | Acceptable for most commercial uses. |
| Poor | < 80% | Significant light loss, inefficient design5. |
Always demand the numbers. A reliable manufacturer will have this data ready and will be proud to share it.
What is the best downlight layout?
Have you ever walked into a beautifully designed space that feels off because of bad lighting? Glaring spots and dark corners can ruin the entire atmosphere, making your work seem subpar.
The best downlight layout6 uses a "Batwing" light distribution to create uniform illumination. Unlike standard layouts, it pushes light outward, not just down. This reduces glare and brightens walls, making spaces feel larger and more comfortable. Always check the IES file7 for this distribution curve.
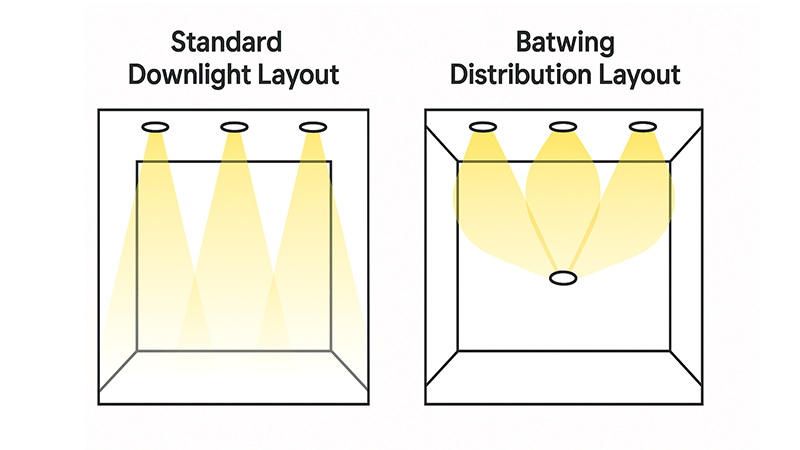
A good layout is not just about where you place the lights; it's about what kind of light they emit. Many contractors simply space downlights evenly, assuming that will work. But if the downlights have a narrow, focused beam, you get a "scalloping" effect on the walls and hot spots on the floor. It looks unprofessional. The secret used in high-end commercial and retail projects is to choose downlights with the right optical distribution. You, as the purchaser, have the power to specify this.
Here’s how you can identify and specify the best optical design for truly professional results.
Understanding Light Distribution Curves
The light distribution curve8, found in the IES or LDT file, is the "ID card" of a downlight's optic. It shows exactly where the light goes. You must always ask for this file from your supplier.
- Standard Distribution: Most basic downlights have a bell-shaped curve. The light intensity9 is strongest directly underneath the fixture. This is what causes glare and an uneven, cave-like effect if not planned carefully.
- Batwing Distribution: This is the game-changer. The IES file for a Batwing optic will show that the peak light intensity is not in the center (0°) but rather between 30° and 60°. This shape looks like a bat's wings, which is where it gets its name.
| Feature | Standard Distribution | Batwing Distribution |
|---|---|---|
| Peak Light | Directly below the light (0°) | Pushed outwards (30°-60°) |
| Effect | Creates hot spots, potential for glare | Reduces overhead glare, illuminates walls evenly |
| Uniformity | Can create dark areas between lights | Excellent wall-to-wall brightness |
| Best For | Accent lighting, simple tasks | Offices, retail, hallways, and large open spaces |
When you review the IES file, you’re not just checking a box. You are verifying the engineering behind the light. A supplier who can provide a clean Batwing distribution10 curve is a supplier who understands advanced optics.
How many lumens for downlights?
Specifying lumens can feel like a guessing game. Choose too few, and the space is dark and unusable. Choose too many, and you waste energy and create an uncomfortably bright environment.
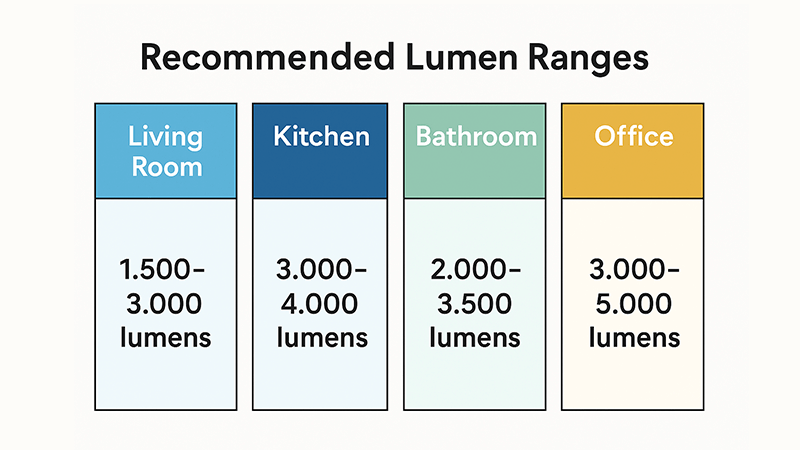
The required lumens depend on the room's function and ceiling height. For general residential spaces with 2.7m ceilings, aim for 600-800 lumens per downlight. For commercial offices or retail, you'll need 1000-1500 lumens. Always adjust based on the specified light distribution.
Lumens are just one part of the equation. I remember helping a client who was frustrated because his retail space felt dim, even though he used high-lumen downlights. The problem wasn't the lumen count; it was the poor optical control. All that light was being wasted in hot spots or being absorbed by dark floors. We switched to downlights with a lower lumen package but a much better Batwing distribution. The store instantly felt brighter and more welcoming because we lit the merchandise on the walls, not just the floor. Efficiency and distribution matter more than raw lumen numbers.
Here’s a practical guide to help you specify the right lumen package for your projects, considering the crucial role of optics.
A Practical Lumen Guide
Instead of just one number, think in ranges. It's always better to install a dimmer-compatible system so the end-user can fine-tune the brightness.
| Room Type | Ceiling Height (m) | Recommended Lumens per Downlight | Optical Consideration |
|---|---|---|---|
| Living Room / Bedroom | 2.4 - 2.7 | 600 - 800 lm | A wider beam angle (60°+) creates a soft, ambient feel. |
| Kitchen / Bathroom | 2.4 - 2.7 | 800 - 1200 lm | A mix of wide beams for general light and narrow beams for tasks. |
| Office / Commercial | 2.7 - 3.5 | 1000 - 1500 lm | Batwing distribution is ideal for uniform, low-glare desk lighting. |
| Retail Store | 2.7 - 4.0 | 1200 - 2500+ lm | Use Batwing for general areas and narrow beams for accent spots. |
| High Ceiling (Lobby) | 4.0+ | 2500 - 5000+ lm | Narrow beam angles (15°-24°) are needed to push light to the floor. |
Remember, a downlight with a high-efficiency optic (>90%) and a Batwing distribution can make a 1000-lumen fixture feel brighter than a 1500-lumen fixture with a basic, inefficient optic. Always analyze the lumens in combination with the IES file.
How can you tell if an LED light is good quality?
You receive samples that look identical, but one fails after six months while the other lasts for years. How can you spot the quality difference before you place a large order?
A good quality LED light is defined by its thermal management11 and secondary optics12. Ask about the heatsink material and design. Also, check for anti-glare features like honeycomb louvers13, as these indicate a focus on visual comfort14 and performance, not just basic function.
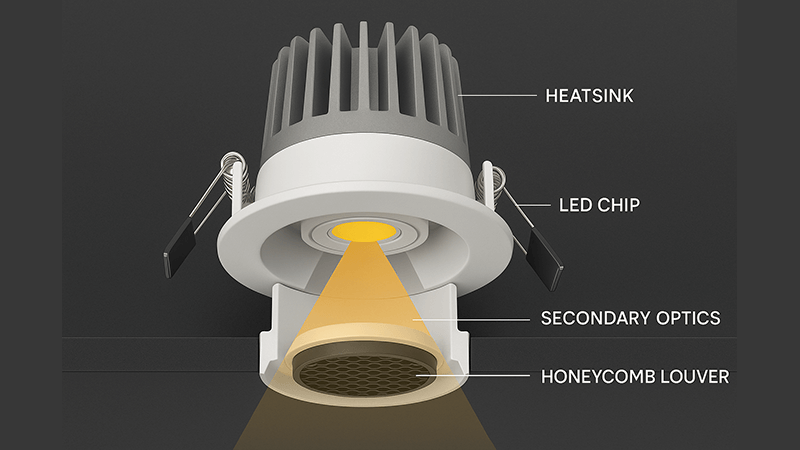
Early in my career, I focused on the LED chip brand and the driver. But I've seen expensive chips fail prematurely because they were put into a poorly designed fixture. Heat is the number one enemy of LEDs and their optics. If a downlight can't get rid of heat effectively, the plastic lens will turn yellow, becoming brittle and dramatically reducing light output over time. This is a permanent failure. Quality is not just about the components you can name; it's about how the entire system is designed to work together and last.
A truly high-quality fixture considers both longevity and the user's visual experience. Here’s what I check for:
The Hallmarks of Quality
- Thermal Management: This is non-negotiable. A good heatsink is not just a chunk of metal. It should have a large surface area with fins to efficiently dissipate heat away from the chip. Ask your supplier what material they use (die-cast or cold-forged aluminum is great) and how it's designed. Poor heat management directly leads to the yellowing of lenses and a permanent drop in light transmittance.
- Secondary Anti-Glare Optics: This is how you separate the good from the great. Manufacturers focused on quality care about visual comfort.
- Honeycomb Louver: A small grid placed at the opening of the light. It physically blocks high-angle light that causes glare. It’s an incredibly effective feature, but it comes at a cost, reducing light output by about 15-20%. A supplier who offers this understands advanced lighting design.
- Frosted or Prismatic Cover: A lens with a micro-textured, beaded, or prismatic surface. This softens and diffuses the light, reducing hot spots and glare. It also causes some light loss but creates a much more comfortable environment.
A supplier who can discuss these features in detail is one who is invested in quality engineering, not just assembling cheap parts.
Conclusion
Focus on optical system efficiency, Batwing distribution, and effective thermal management. By demanding IES files and asking the right questions, you can ensure every downlight you source delivers superior performance.
Learn how high-lumen products can impact your lighting design and efficiency. ↩
Understanding lumen output helps you specify the right brightness for your space. ↩
The LED chip is crucial for determining the brightness and efficiency of the light. ↩
Understanding this metric is crucial for ensuring high-quality lighting performance. ↩
Learn the key characteristics that make a downlight efficient and effective. ↩
A well-planned layout can significantly improve the ambiance of a space. ↩
The IES file provides essential data on light distribution, helping you choose the right downlight. ↩
This curve is essential for understanding how light is spread in a room. ↩
Understanding light intensity helps in selecting the right fixtures for your needs. ↩
This distribution method enhances uniformity and reduces glare, making spaces feel larger. ↩
Effective thermal management prolongs the life of LEDs and maintains performance. ↩
Secondary optics play a vital role in controlling light output and reducing glare. ↩
Discover how this feature enhances visual comfort in lighting design. ↩
Explore how lighting design affects comfort and usability in various environments. ↩

