Choosing the wrong beam angle can ruin a perfect lighting plan. It creates dark spots or uncomfortable glare, wasting your money and effort. Learn to select the perfect beam angle every time.
The right beam angle for IP44 downlights is crucial because it directs light precisely where you need it. This focus is key in moisture-prone areas. It ensures proper illumination, enhances visual comfort, and prevents issues that can compromise the light's IP rating and longevity in places like bathrooms.
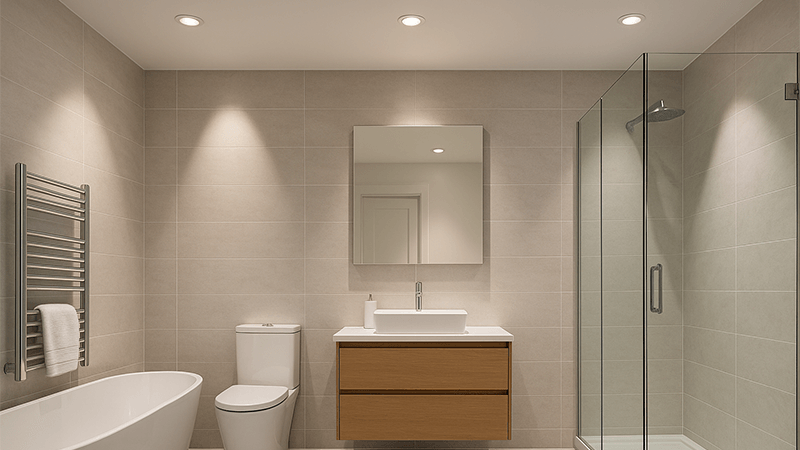
Getting the beam angle1 right seems simple, but it is about more than just a number on a spec sheet. The choice you make directly impacts the mood, functionality, and safety of a space. It’s what separates a professionally lit room from a poorly lit one. To truly master lighting design2, you need to understand the details behind the beam. Let's dive deeper and explore what you need to know to make the perfect choice for your projects.
What Does Beam Angle Mean in Lighting?
You see "beam angle" listed on every specification sheet you review. But making a choice without fully understanding its impact can lead to poor lighting outcomes and unsatisfied clients. Let's clarify what this crucial number really means.
Beam angle measures how light spreads from its source, telling you the width of the light cone. It is measured at the point where the light's intensity drops to 50% of its maximum. A narrow angle creates a focused spotlight, while a wide angle provides broad, general light.
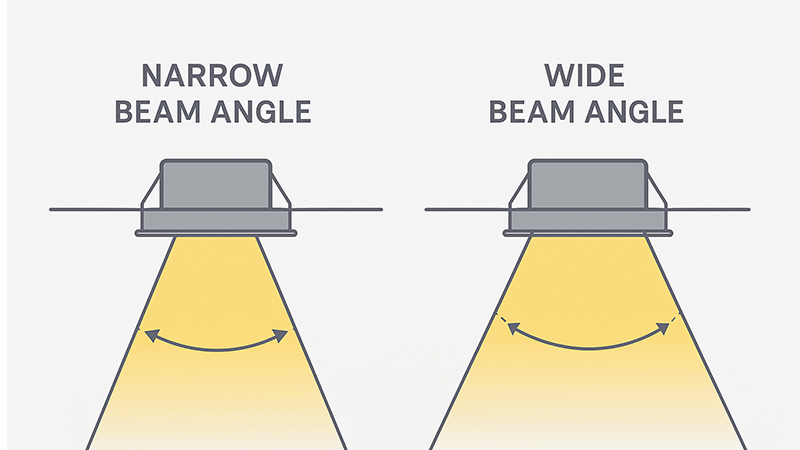
When I started in this industry, I learned that the beam angle is just one part of the story. There is also the "field angle," where the light intensity drops to 10%. The beam angle is the bright, useful light, while the field angle3 includes the softer light at the edges. For most applications, we focus on the beam angle. The quality of this beam, however, starts with the physical product. I always tell my clients to inspect an IP44 downlight when it's switched off. A high-quality reflector4 cup and lens should look like a piece of art. The precision in its finish is the first clue that the manufacturer cared about controlling the light, which is essential for a clean, consistent beam. This attention to detail in the optics is a sure sign of a superior product. A well-crafted optic ensures the beam angle on the box is the beam angle you get on your ceiling.
To help you visualize the difference, here is a simple breakdown:
| Feature | Narrow Beam Angle (<40°) | Wide Beam Angle (>60°) |
|---|---|---|
| Visual Effect | Creates a focused "spotlight" effect. | Produces a broad "floodlight" wash. |
| Best For | Accent lighting, task lighting5, high ceilings. | General ambient lighting6, open spaces, low ceilings. |
| Atmosphere | Dramatic, high contrast, draws attention. | Open, uniform, comfortable. |
| Spacing | Lights need to be spaced closer together for overlap. | Lights can be spaced further apart for even coverage. |
Should the Beam Angle Be 60 or 120 Degrees?
You are weighing your options for a project, stuck between a 60° and a 120° downlight. Making the wrong choice could make a room feel like a dark cave or a sterile operating room.
Choose a 60° beam for most general lighting applications in rooms with standard height ceilings, like kitchens or living areas. It offers a good balance of coverage and intensity. Use a 120° beam for areas with low ceilings or when you need maximum, widespread coverage with fewer fixtures.
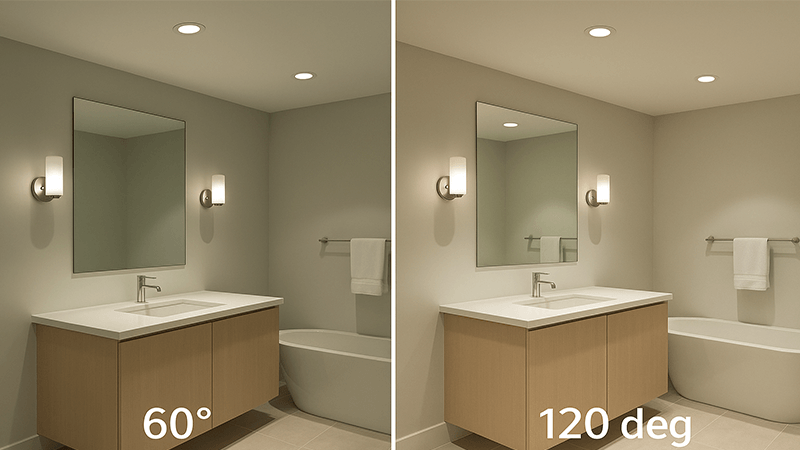
The decision between 60° and 120° depends entirely on the application. There is no single "better" angle. It is about matching the light to the space. For example, a 60° beam is a versatile workhorse for standard ceilings between 2.4 and 2.7 meters. It provides strong, usable light on the floor and surfaces while still overlapping enough to create a uniform feel. A 120° beam in that same room might feel too flat and lack focus. However, in a hallway with a low ceiling of 2.2 meters, a 120° beam is perfect. It spreads the light wide, making the narrow space feel larger and avoiding bright "hotspots" on the floor. When I hold two similar-looking downlights in my hands, one of my simple quality checks is to feel their weight. If they have the same power and dimensions, the heavier one is usually the better product. More weight often means more die-cast aluminum7 used in the heat sink. Better heat management means a longer, more reliable life for the LED chip8 and driver, regardless of the beam angle.
Here is a quick guide to help you decide:
| Room Type | Ceiling Height (Meters) | Recommended Angle | Why? |
|---|---|---|---|
| Bathroom (General) | 2.4m - 2.7m | 60° - 90° | Provides good ambient coverage. The IP44 rating is critical here. |
| Kitchen Island or Counter | 2.4m - 2.7m | 40° - 60° | Delivers focused task lighting5 directly onto the work surface. |
| Hallway or Walk-in Robe | < 2.4m | 90° - 120° | Creates a wide, even wash of light, making the space feel bigger and brighter. |
| Living Room (High Ceiling) | > 3.0m | 60° or narrower | Pushes more intense light down to the floor and furniture level. |
What Does a 40-Degree Beam Angle Mean?
You need to highlight a specific feature in a room, like a piece of art or a workspace. A wide beam angle9 would just wash everything out, losing all impact and focus. This is where a narrower beam shines.
A 40-degree beam angle is a versatile medium flood. It creates a beam that is focused enough for accent and task lighting but still wide enough for some general illumination. It is perfect for drawing attention to architectural details, artwork, or lighting a kitchen counter.
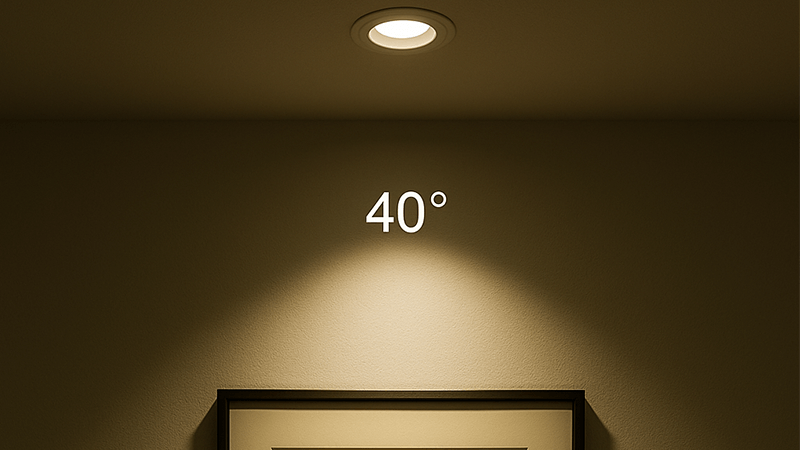
A 40-degree beam is one of my favorites for its balance. It is not as dramatic as a true 24-degree spotlight, but it provides much more punch than a 60-degree general floodlight. Think about lighting a kitchen. You might use 60-degree downlights for the main walking areas, but over the island and counters, you would switch to 40-degree beams. This puts a strong cone of light exactly where the chopping and cooking happen, reducing shadows and improving safety. The same logic applies to highlighting a beautiful textured wall or a piece of art. A 40-degree beam can illuminate it perfectly without spilling too much light onto the surrounding area, making the feature pop.
During my years running a factory, I developed a simple trick for judging material quality. I gently tap the housing of the downlight with my fingertip. If I hear a dull, solid "thud," it tells me the body is likely made from thick, die-cast aluminum. This is good for durability and heat dissipation. If it makes a high-pitched, ringing "ting" sound, it could be thin stamped metal or cheap aluminum, which will not perform as well over time. The sound of quality is something you learn to recognize, and it applies to every part of the fixture, from the heat sink to the optic that shapes that 40-degree beam.
| Angle | Common Name | Primary Use | Typical Application |
|---|---|---|---|
| 24° | Spot | Dramatic Accent Lighting | Highlighting a small sculpture or retail product. |
| 40° | Medium Flood | Task Lighting & General Accent Lighting | Over a kitchen island, desk, or lighting a poster. |
| 60° | Flood | General Ambient Lighting | Illuminating a whole living room or bedroom. |
How Can You Reduce a Beam Angle?
Your client has changed the room layout, and now the existing downlights are too wide. Replacing all the fixtures is expensive, wasteful, and time-consuming. You need a simpler solution to adapt the light.
You can easily reduce a downlight's beam angle using accessories like a honeycomb louver, which cuts peripheral light and glare. For a more significant change, you can swap the built-in reflector or lens for one with a narrower optic, if the downlight's design is modular.
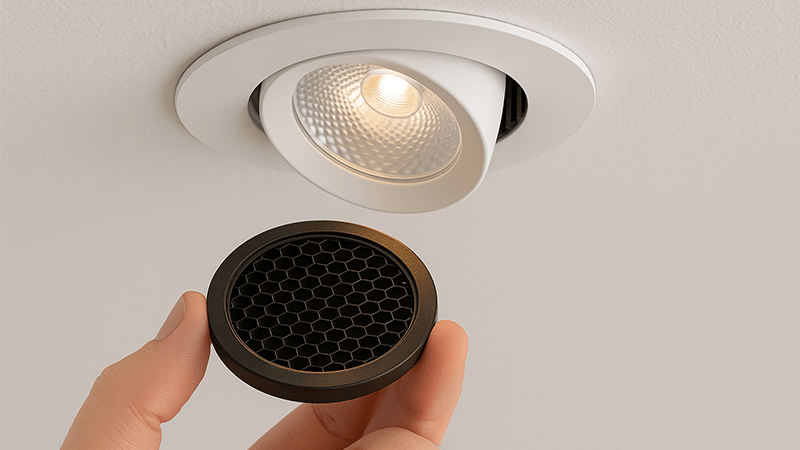
One of the signs of a well-designed lighting product is its flexibility. You should not always have to replace a whole fixture to change the lighting effect. The easiest way to narrow a beam is with an accessory. A honeycomb louver10 is a simple grid that clips into the front of the downlight. It works by blocking the light that travels at high angles, effectively tightening the beam and dramatically reducing glare. Another option is a snoot, which is a small tube that extends from the fixture to physically funnel the light into a smaller circle.
For a more permanent and efficient change, you can modify the optics. Many of our professional-grade downlights at iPHD are modular. This means you can simply twist off the standard 60-degree reflector and replace it with a 38-degree or 24-degree version. This gives you incredible flexibility on-site without changing the fixture. When you are sourcing products, always ask the supplier if they offer interchangeable optics. This feature can save you and your clients a lot of money and hassle down the road. During quality control, my final test is always the "smell test." I let a new IP44 downlight run for an hour, then I check for any smells. A sharp, burning plastic odor is a major red flag. It indicates that the driver components or internal wiring have a low temperature rating and could be a safety hazard. A quality product, built with the right materials, should not have any offensive smell.
Conclusion
Choosing the right beam angle is essential. It directly impacts a room's mood, function, and safety. Use these professional insights to select the perfect IP44 downlights11 for every unique space.
Understanding beam angle is crucial for effective lighting design, ensuring optimal light distribution and ambiance. ↩
Explore the fundamental principles of lighting design to create functional and aesthetically pleasing spaces. ↩
Understand the difference between field angle and beam angle for better lighting design decisions. ↩
Discover tips for identifying high-quality reflectors that ensure better light control and performance. ↩
Learn about task lighting and how to select the right fixtures for specific activities. ↩
Explore the role of ambient lighting in creating a comfortable and inviting atmosphere. ↩
Understand the advantages of die-cast aluminum in lighting fixtures for durability and heat management. ↩
Explore the importance of LED chips in determining the efficiency and longevity of lighting fixtures. ↩
Learn how a wide beam angle can provide broad illumination and enhance the ambiance of a space. ↩
Learn about honeycomb louvers and how they can reduce glare and improve lighting focus. ↩
Explore the benefits of IP44 downlights, especially in moisture-prone areas like bathrooms, for effective lighting. ↩

