Frustrated by lighting that’s uneven or inconsistent in your projects? These dark spots and harsh glares can ruin an otherwise perfect design, making spaces feel uncomfortable and unprofessional. The solution lies in using the right fixture with a precise plan.
LED downlights are critical for uniform lighting because their controlled, directional light, wide range of beam angles, and consistent performance allow for calculated spacing. This precision ensures light patterns overlap perfectly, eliminating shadows and creating a smooth, even illumination across any room.
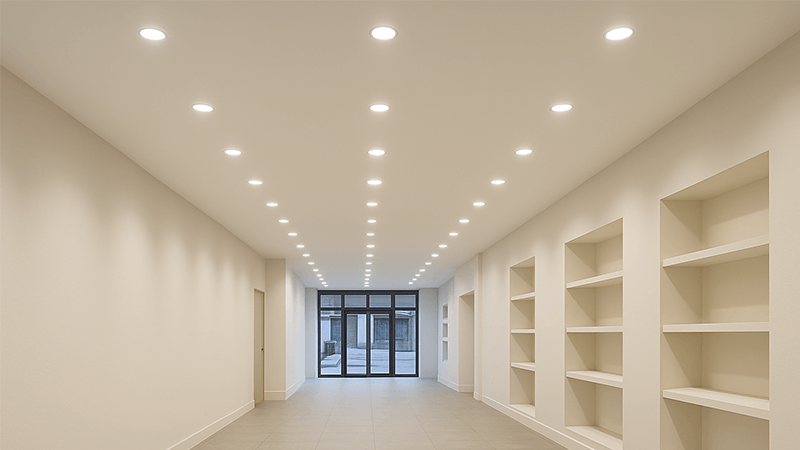
Achieving that perfectly smooth blanket of light is the goal for so many projects. When I started in this industry, working on the factory floor, I saw firsthand how the quality of a single fixture could make or break a whole installation. It’s not just about buying a good downlight; it’s about understanding how to use it. A great layout turns a collection of individual lights into a single, cohesive lighting system. It’s a process that requires a bit of science and a lot of practical know-how. Let me share what I’ve learned over the years to help you get it right every time.
What is the main advantage of using LEDs for various lighting applications?
Are you tired of high energy bills and frequent bulb replacements? Traditional lighting is inefficient and offers very little design flexibility, costing you money and limiting your creative options. LEDs solve these problems with superior performance.
The main advantage of LEDs is their unmatched energy efficiency1 and incredibly long lifespan2. They use far less electricity to produce the same amount of light as older technologies, which significantly cuts energy costs and reduces maintenance.
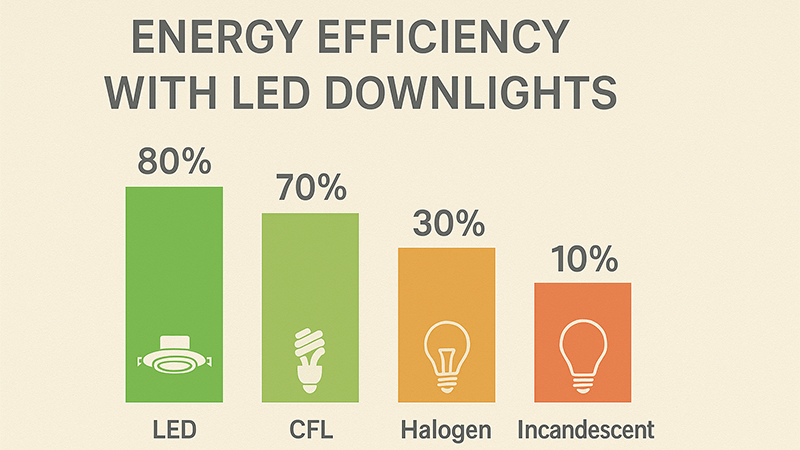
When I first entered the lighting business, incandescent bulbs were still common. We saw so much energy wasted as heat. The shift to LEDs changed everything. It wasn't just an improvement; it was a complete revolution in what lighting could do.
Unpacking LED Superiority
The advantages of LED technology go far beyond just saving energy. For a purchasing manager like you, Shaz, understanding these details helps in sourcing products that deliver real value and performance for your projects. Let's break down why LEDs are the undisputed choice today.
- Exceptional Efficiency: This is measured in lumens per watt3 (lm/W). A typical LED downlight can produce 80-120 lm/W, while an old incandescent bulb might only manage 10-17 lm/W. This means for the same amount of power, you get 5-10 times more light. This directly translates to lower electricity bills for the end-user.
- Remarkable Lifespan: An LED's life is often rated at 30,000 to 50,000 hours or more. This isn't until it burns out, but until its light output degrades to 70% of its initial brightness (known as L70). This long life dramatically reduces the cost and hassle of replacements, which is a huge benefit in commercial spaces4 with high ceilings.
- Superior Control: LEDs are semiconductors, which means they can be dimmed smoothly without flickering or color shifting, unlike many CFLs. They also enable advanced features like color tuning (CCT), allowing you to change the light from a warm white to a cool white with a simple controller. This level of control is essential for creating versatile and human-centric lighting environments.
Here is a simple comparison to keep in mind:
| Feature | LED | Incandescent | Halogen |
|---|---|---|---|
| Avg. Lifespan | 50,000 hours | 1,200 hours | 3,000 hours |
| Energy Efficiency | Very High | Very Low | Low |
| Durability | Very High (Solid State) | Low (Fragile Filament) | Low (Fragile Filament) |
| Control | Excellent (Dimming, CCT) | Good (Dimming only) | Good (Dimming only) |
Why is a lighting layout crucial in any space?
Have you ever walked into a room and felt uneasy without knowing why? Poorly placed lights can create harsh glare, deep shadows, and an uncomfortable atmosphere. A proper lighting layout5 prevents this.
A lighting layout is crucial because it directly defines a space's function, mood, and safety. A strategic plan ensures correct light levels for tasks, avoids visual discomfort, and transforms an ordinary room into a well-designed, inviting environment.
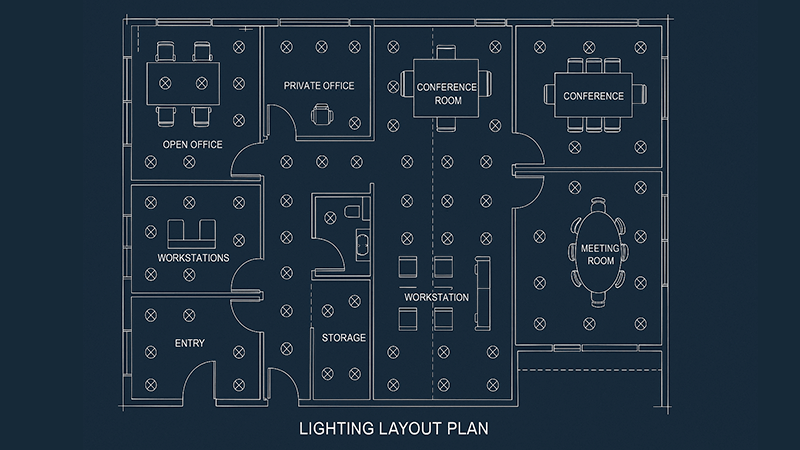
A lighting plan is the blueprint for a successful project. Without one, you're just guessing. I’ve seen expensive, high-quality fixtures6 fail to impress simply because their placement wasn't thought out. The layout is what separates a professional installation from an amateur one. It’s where you apply the technical specifications of a luminaire to the real world to achieve a specific goal, whether it’s for productivity in an office or relaxation in a hotel lobby.
From Blueprint to Reality
Creating a functional and beautiful space isn't about simply filling it with light. It’s about placing the right amount of light exactly where it's needed. This is the core purpose of a lighting layout.
-
### Step 1: Calculate Your Layout The first step is always math. You need to consider the ceiling height and the beam angle of your chosen LED downlights7. A wider beam angle (like 60°) allows for greater spacing between fixtures, while a narrower beam (like 24°) requires them to be closer together for the light to overlap. A good rule of thumb is to set the spacing between downlights at roughly half the ceiling height. The distance from the wall is typically half of the spacing between the fixtures. This is a basic formula for general ambient light8ing, but it's a critical starting point.
-
### Step 2: Ensure Functionality The layout dictates if a space works as intended. In an office, you need uniform, glare-free light on desks for productivity. In a retail store, you need a mix of ambient light and focused accent light to highlight products. A layout ensures you meet these functional requirements, using layers of light to support different activities within the same space.
-
### Step 3: Enhance Mood and Aesthetics Lighting has a massive impact on our perception of a space. A good layout can make a small room feel larger or a large hall feel more intimate. It creates visual interest by drawing attention to architectural details or artwork. By controlling areas of light and shadow, you shape the entire emotional experience of the room. This is why uniform lighting9 is often the foundation—it creates a clean, calm canvas to build upon.
What is the uniform lighting effect?
Are you aiming for a clean, modern, and spacious feel in your project? Cluttered lighting with distracting hot spots and dark corners undermines that goal. The solution is creating a seamless, even wash of light.
Uniform lighting is an effect where illumination is distributed evenly across a horizontal surface, like a floor or work plane. It minimizes variations in brightness, eliminating harsh shadows and creating a sense of openness and visual comfort10.
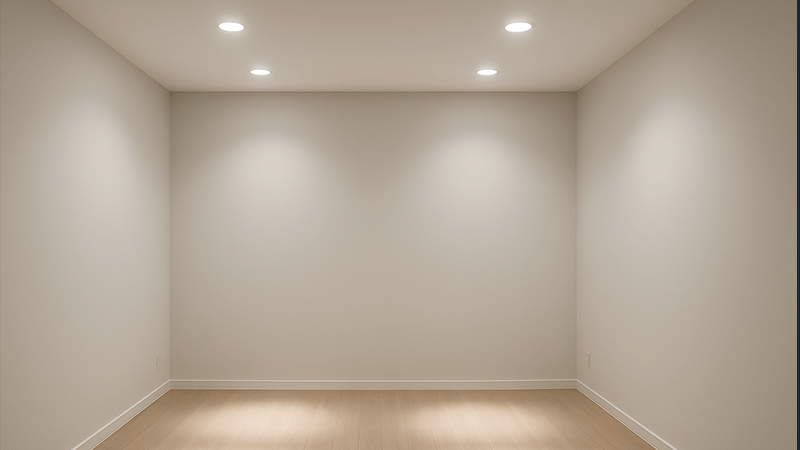
Achieving true uniformity is a technical challenge. It’s a sign of high-quality design and installation. In our factory, we spend a lot of time perfecting the optics of our downlights specifically for this purpose. A fixture with a poor-quality lens can have a bright "hot spot" in the center and dim edges, making uniformity impossible no matter how well you space them.
The Science Behind a Smooth Finish
Uniformity isn't just a subjective feeling; it's a measurable quality of a lighting installation. It’s about creating an environment where the light itself goes unnoticed, allowing the focus to be on the space and the objects within it.
-
### Step 4: Choose the Right Optics To achieve uniformity, the optical design of the downlight is key. For general or ambient lighting, you should look for fixtures with a wide, smooth distribution. A "batwing" distribution is often ideal. Instead of a simple cone of light, a batwing optic pushes more light out to the sides. This allows the light from adjacent fixtures to overlap more effectively at the midpoint between them, smoothing out the light levels on the floor and preventing dark spots. For task or accent lighting, a narrower beam is better, but for the base layer of uniform light, wide distribution is your best friend.
-
### Step 5: Ensure Consistency Across Fixtures Uniformity is impossible if your lights don't match. As a purchasing manager, you must specify and demand consistency. This means ordering all fixtures for a single area from the same production batch to avoid color variation. You should also specify products with a high Color Rendering Index11 (CRI > 90) so colors look natural, and a low Standard Deviation of Color Matching (SDCM < 3) to ensure all white light looks exactly the same. Even a small difference in color temperature12 between two fixtures can ruin the uniform effect. This is a detail I always stress with my clients.
Are LED downlights any good?
Wondering if LED downlights are the right choice for your project? With so many options out there, it’s easy to feel unsure about committing to one type of fixture. Can they really deliver the quality you need?
Yes, high-quality LED downlights are incredibly good. They offer an unbeatable combination of efficiency, control, and design flexibility, making them the superior choice for creating modern, effective, and uniform lighting schemes in nearly any environment.
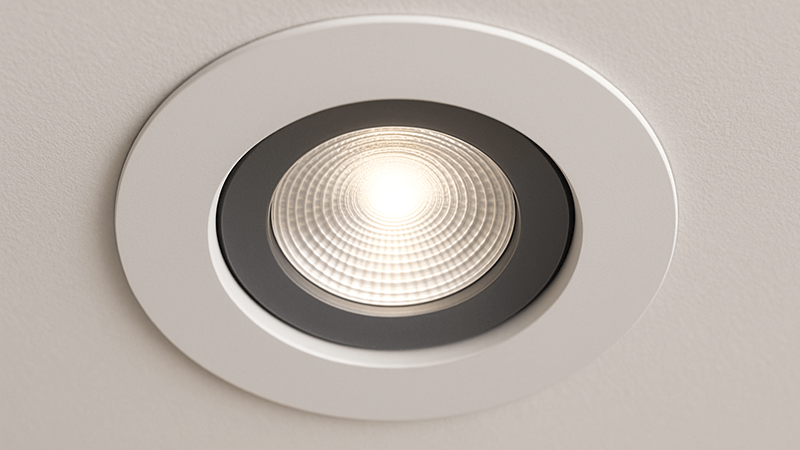
Absolutely. But I must add a condition: high-quality LED downlights are good. The market is flooded with cheap alternatives that flicker, have poor color quality, and fail quickly. As a manufacturer, I see the difference in the components—the LED chip, the driver, the heat sink, and the optics. Investing in a well-made downlight from a reliable supplier is the most important decision you can make. It’s why we focus so heavily on quality control at iPHD.
Verifying Quality Before Committing
Trust, but verify. This is a motto I live by in manufacturing and I advise all my clients to do the same. A datasheet can tell you a lot, but seeing the product perform in the actual environment is the only way to be 100% sure.
-
### Step 6: Simulate and Validate For large or critical projects, don't leave things to chance. Use lighting design software13 like DIALux. A lighting designer can build a 3D model of your space and import photometric files14 (IES files) for the specific LED downlights you plan to use. These files contain data on how the light is distributed from the fixture. The software can then simulate the final lighting effect, showing you exactly how uniform the light will be and flagging any potential problem areas before you ever place an order. This provides scientific validation for your layout.
-
### Step 7: Always Test On-Site This is the final and most crucial step. Never, ever skip making a mockup15. Order a few sample fixtures and install them on-site according to your planned layout. See them with your own eyes. Does the light feel comfortable? Is the color what you expected? Use a light meter to measure the illuminance levels on the floor to check for uniformity. This hands-on test allows you to make adjustments and confirm your choice before committing to a bulk purchase. It has saved my clients from costly mistakes countless times. It’s the ultimate proof that your plan, and your chosen products, will deliver the results you need.
Conclusion
In short, achieving perfect uniform lighting is a systematic process. By using quality LED downlights and following a calculated plan involving simulation and on-site testing, you can guarantee professional, comfortable, and beautiful results.
Discover how energy-efficient lighting can save costs and reduce environmental impact. ↩
Find out how LED lights outlast traditional bulbs, saving you money on replacements. ↩
Get insights into how lumens per watt affects lighting efficiency and performance. ↩
Discover effective lighting strategies tailored for commercial environments. ↩
Understand how a well-planned lighting layout can transform a space and improve functionality. ↩
Discover key features that define high-quality lighting fixtures for your projects. ↩
Explore the advantages of LED downlights for achieving uniform lighting in various spaces. ↩
Learn about the role of ambient light in creating a balanced lighting scheme. ↩
Learn techniques to create seamless, even lighting that enhances the aesthetic of any room. ↩
Explore the relationship between lighting design and the comfort of occupants in a room. ↩
Learn how CRI affects color perception and the quality of light in your projects. ↩
Explore how color temperature influences the mood and functionality of a space. ↩
Discover tools that can help you simulate and validate your lighting designs effectively. ↩
Understand the importance of photometric files in simulating lighting effects accurately. ↩
Understand the value of testing lighting fixtures on-site before making bulk purchases. ↩

